Monday, March 8, 2010

Vermiculite? NOT!

 
So this stuff in the attic that I was worried was vermiculite was in fact not. How strange. I wonder what this stuff is and what it's doing in the attic. Maybe it was a scam to sell vermiculite insulation and the previous home owner got gravel instead? I don't know.

The e-mail from Western Analytical Lab reads:
The sample you submitted for analysis contains no asbestos.  Please note your sample is NOT vermiculite insulation.

We'll mail a written report in a couple of days.
So I guess we'll see when they send over their report if more information is revealed as to the identity of this material.

Clean-up!

So every year Santa Clara has it's Clean-up Campaign. Basically everyone in Santa Clara gets to throw pretty much anything out their sidewalk and the city pays various clean-up crews to come pick it up and haul it away.

This comes at a great time since the Money Pit came with a few truckloads of trash that the previous owner did not bother to haul away themselves. Plus the crap and rotted fixtures that I threw out (so far).

It was actually entertaining in a sneaking-cookies-from-the-cookie-jar kind of way. I mean, how often have you just thrown truckloads of stuff into the street and not expect to get into trouble? I was giddy. I saw a house with a mountain a dirt, another with a mountain with rocks, and a house being rebuilt with furniture and construction debris sitting out in the street.

There were a ton of pickers out. There were a few pickers that knew each other from picking trash in other neighborhoods that talked like they did this pretty regularly. Mostly they were after scrap metal. But there were few people that specifically picking for useful things. I saw a truck hauling just kids-toys weaving through the neighborhood. Another truck full of plastic chairs. The kind thing to do apparently is lay out your "pickable" stuff for those guys, and then trash piled on another side.

So I had the roach infested cabinets out there. During the day, people were interested but realized how bad they were and left them. By nightfall someone couldn't see what they were getting into and took the entire set. I kind of felt bad.

 
In the picture above, there was actually a lot more that I put out, than you see. Pickers had picked about a quarter of it by the last day.


On the first day, Saturday, the professional pickers came en masse. By the time Sunday rolled around amateurs were picking for what's left, and a lot of people shopping. I was actually tempted to start looking for stuff but I resisted the urge.

I think I had the second biggest pile that I saw. The first biggest pile was the reconstructed home.

Thursday, March 4, 2010

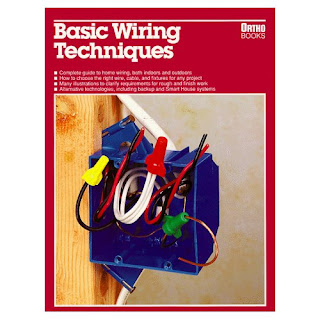
Basic Wiring Techniques

So a couple days ago, I had mentioned earlier that I had bought the book, "Your Old Wiring" by David E. Shapiro. It's a meaty book and I like it very much. It explains theory very well, and brings to bear the author's many years of experience.

But I'd also like to draw attention to another book I wasn't sure about. It came recommended on a web page somewhere lost along my surfing. It is: "Basic Wiring Techniques" by Steve George and John Lowe.
 
This book is the cat's meow. It comes with lots of pictures, and for my particular experience and knowledge of electricity it's the perfect way to help me gain the overall big picture.

Despite reading about how panels work many times and in many places, this book explained to me in two drawings or less. That's impressive.

However, the book is a bit dated (1994). NEC code is updated every 3 years. But this covers the basics and that hasn't changed much. Everyone needs to learn the basics somewhere.

After reading this book, I can go back and refer to something like "Your Old Wiring" and the NEC handbook for details and understand what they're talking about.

So I've been making a list of things I'll need to purchase before I undertake rewiring the Money Pit:
  • fish tape
  • power drill with 3/4" spade (or bit)
  • chisel to chip plaster
  • saber saw
  • alligator clips for my DMM
  • black, white, green electrical tape
And of course, a whole lotta Romex (NM cable).

Tuesday, March 2, 2010

LED light bulb

When I was at Fry's Electronics the other day, I found these neat LED lightbulbs. They are a bit expensive but they're energy efficient. They are made by Normande Lighting and plug into standard 120VAC light bulb socket. For $7.99 you could get a 30 lumen light bulb that expends 700 milli-watts and should run 30,000 hours, or 3.5 years. So at 10 cents a kilo-watt hour this thing should cost $60/year if you ran the thing continuously. If you ran a 70 watt light bulb like that, you'd be looking at $6,000/year. And I don't think standard light bulbs last 30,000 hours. So I put this as a porch light. It keeps the Money Pit illuminated with a soft eerie glow. Celle calls it moonlight. The street is a bit dark, so this also keeps the Money Pit from looking completely scary at night.

There are more powerful ones that get up to the 7 watt and beyond, but that'll run you upwards of $25 a bulb. So they're not cheap.

CU-Creations

I've been admiring the handy work of hoods at CU-Creations in Santa Monica, California. A nice copper hood would not go well with a stainless steel stove. You would have to go black. Here would be my pick. I love the accents and the hammered unfinished look. I bet it's pricey.

From their website here's what they say about themselves:
Cu-Creations offers Custom and standard Range Hoods at great prices and of highest quality! Hoods can be placed indoor or outdoors and made from copper, stainless steel, aluminum, galvanized, bonderized and kynar!

110V AC

 
One of the main reasons I went up into the attic the other day was to figure out where the doorbell transformer was.

With my DMM (Digital Multi Meter) I tested for the voltage and current at the button. There was nothing on the meter.

Looked for the chimer and found it on a kitchen wall. Took it down and examined it. Played with the chimes and inspected the coil. It looked like it work.

I traced the wire from the doorbell in the attic and followed it to the chimer, and then followed the line to to a wall that looked like it was going down to the basement. I read most places put the doorbell transformer in the basement next to the panel. And that's exactly where it was. In the basement behind the wall where the panel would be outside.

I tested that the voltage going into the transformer was 120VAC and found nothing coming out of the step down side.

This thing must be really old. I've never seen a transformer look like this ever. The connectors are rusting. Notice the insulation is made of thick cloth instead of plastic, and it's that old industrial olive color (think color of WWII armor). The other interesting thing about this is it's rated at 110 volts (maybe the reason it blew). Current U.S. standard is 120 volts AC. 110 volts went away soon after Thomas Edison lost the battle to supply 110 volts DC to the residential sector.

Another reason that it may have blown is that the dielectric may have gone bad. I don't know what they use in transformers, then or now, but looking at the insulation they used for wires back then, I'm almost certain it wasn't anything good either.

So the people who updated the kitchen electricity seemed to just cut the old knob and tube wiring into the kitchen. So from the panel there was a two way split to the doorbell and then to the kitchen. That wouldn't bug me so much, except that the connection was handled with tape, and solder. And of course, everything was just hanging outside the junction box.

So I ripped that sucker out and went searching for a brand new one.

My first stop was Fry's Electronics. I remember walking into Fry's the first time a long time ago and thinking: "Wow! Shelves and shelves of discrete components!" It isn't like that anymore. Nobody knew what a transformer was, nobody knew where their discrete components were located, and there weren't shelves and shelves of the stuff. And the stuff they did have couldn't put Radio Shack to shame.

So I called a real electronics store that I found with the iPhone Maps app. Thank goodness we're in the bay area. Growing up in LA it was almost impossible to find an electronics store that wasn't Radio Shack. (Don't get me wrong. I like Radio Shack. I buy stuff their all the time. In high school, and going to Don Bosco Technical Institute, I easily knew more about electronics than the guys there did, and so I always had problems getting exactly what I needed. So I generally avoid going there if I feel I might need to ask the rep a question, because chances were more than good that if I didn't know, they didn't know either.)

So the local electronics store I called, Anchor Electronics, in Santa Clara, probably sold parts to guys that made battle robots in their spare time. The guy there said he probably had a transformer that'd work, except he wasn't sure if they'd be rated for use as a doorbell. There were no mounts or easy way to connect leads too. He told me to just go to my local OSH (Orchard Supply Hardware.)  He was right. OSH had it. It looked like a normal modern transformer, except it had screw-ins for the doorbell leads, a bracket to mount the thing, and a weird mount that held the 120VAC leads in place.

I got my doorbell working. I did things a little better than the last guy by not much. But at least things are somewhat sitting inside a junction box. I need to read up a little more on typical doorbell transformer installation housings and correct that later.

Monday, March 1, 2010

Asbestos free ceiling!

So a couple days ago I wrote about testing my ceiling with a sample I sent over to Western Analytical Labratory for analysis. I got good news! It turns out the ceiling does not contain asbestos! Celle was happy to hear that because she's been dying to get rid of it.

Here's the e-mail that they sent me:
The acoustic ceiling spray sample you submitted for analysis contains no asbestos. 

We'll mail a written report to you in a couple of days.

Please note: The EPA strongly recommends testing at least three samples of acoustic spray (from different parts of the residence) because asbestos was hand-mixed in this material on job site and its distribution can be uneven across the ceiling.
So we'll probably test out each room as we go.

Popcorn acoustic ceilings helped deaden the noise between floors. It might also help deaden the echo in older homes like the Money Pit. The echo is prominent in plaster and lath and is desirable to a segment of savvy home buyers. By adding the popcorn ceiling, the noise waves wouldn't reflect perfectly off at least one wall and reduce the echo. Add a curtain and you'd certainly reduce the echo some more. Add furniture and you'd reduce echo even more.

The main reason you find it still is because it became popular in the 60s and 70s. However it was too hard to clean, and its downfall came with the banning of asbestos in the 80s. Asbestos was found to be an ingredient in some forms of acoustic ceiling popcorn. Suddenly they no longer were popular in any form and other ceiling products and tiling became en vogue.

To take the stuff out, I'm told the best way is to wet it and scrape off the goopy muck.

I'm praying that my insulation comes in asbestos free as well.